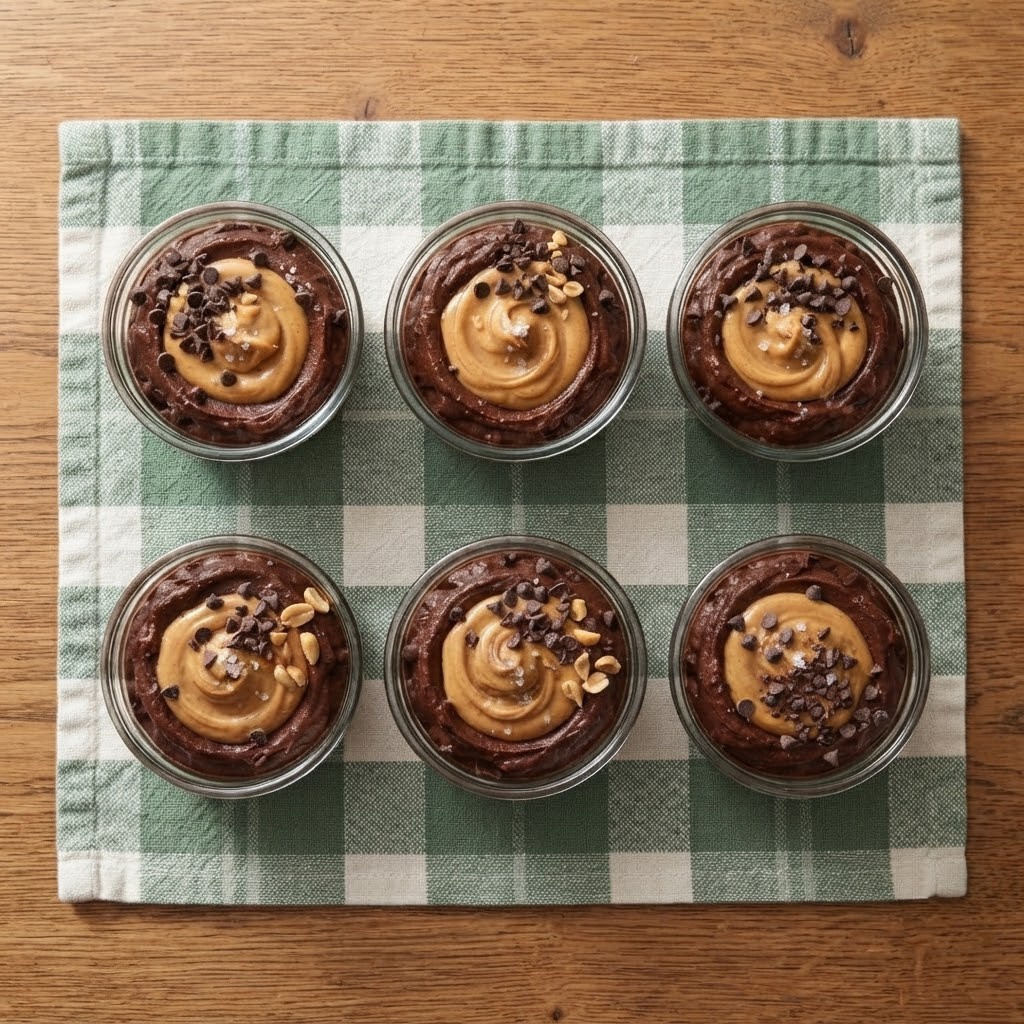
If you’re craving something that tastes like an actual chocolate peanut butter dessert but still fits a protein-focused lifestyle, these Chocolate Peanut Butter Protein Fudge Cups are exactly the kind of recipe you want in the refrigerator.
They’re rich.
They’re chocolatey.
They’re creamy.
And they have that unmistakable peanut butter flavor that makes chocolate peanut butter desserts so hard to resist.
But instead of making a traditional fudge loaded with sugar and butter, these little cups use a combination of Greek yogurt, cottage cheese, chocolate protein powder, cocoa, and powdered peanut butter to create a thick, creamy protein-rich filling.
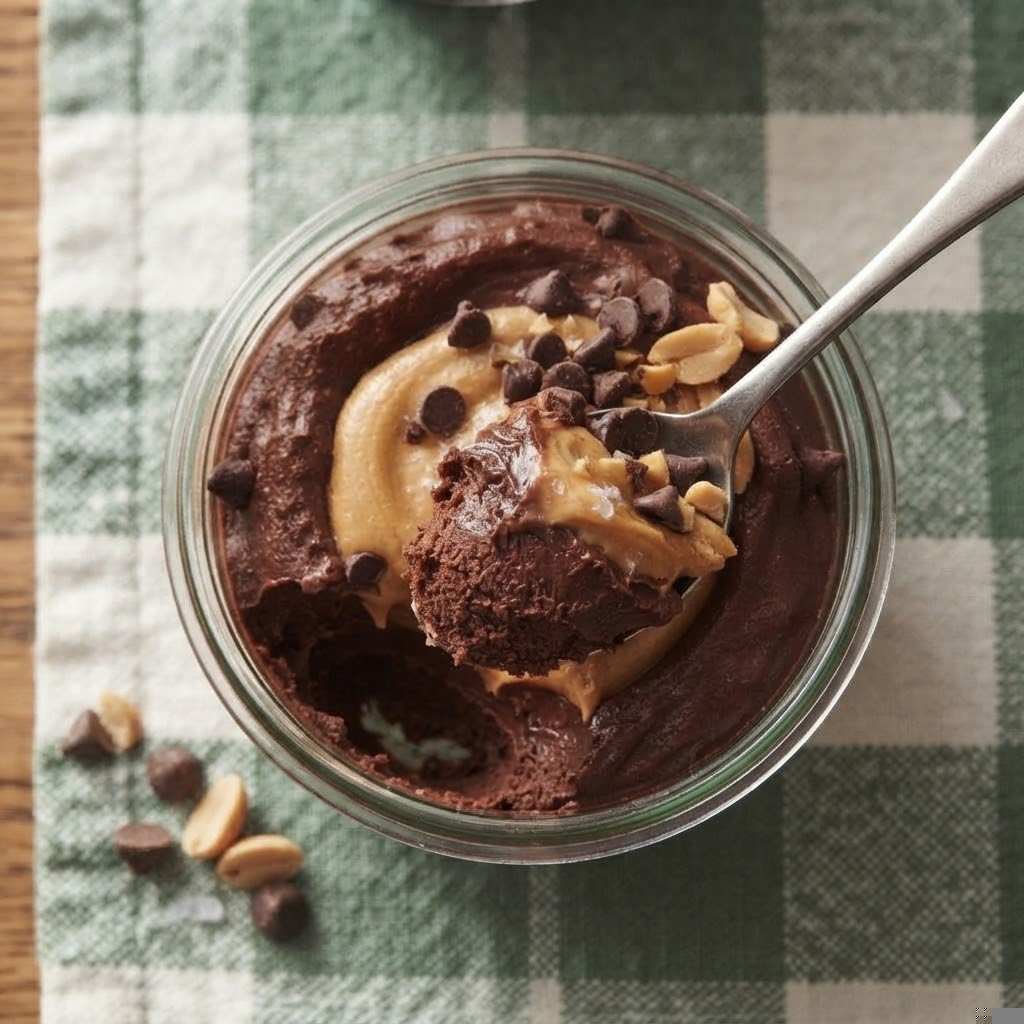
The result is somewhere between a soft fudge cup, chocolate mousse, and peanut butter cream.
And because they’re no-bake, you don’t need to turn on the oven or spend an hour making dessert.
Simply blend the creamy ingredients until smooth, layer them into small cups, chill, and let the refrigerator do the work.
These are especially good when you want something sweet after dinner, a protein-focused afternoon snack, or a small dessert that can be prepared ahead of time.
- The deep chocolate flavor and creamy peanut butter taste work together beautifully.
- Making individual cups means you don’t have to cut and weigh an entire dessert every time you want a serving.
- The combination of chocolate, vanilla, peanut butter, and a touch of salt gives these cups a rich dessert-like flavor.
Ingredients
For the Chocolate Peanut Butter Fudge Base
- ¾ cup creamy natural peanut butter
- ½ cup plain Greek yogurt
- 1 scoop chocolate protein powder
- 2 tablespoons unsweetened cocoa powder
- 2 tablespoons powdered zero-calorie sweetener, or to taste
- 1 teaspoon vanilla extract
- ¼ teaspoon salt
- 2 tablespoons unsweetened almond milk, plus more only if needed
For the Chocolate Fudge Layer
- ¼ cup sugar-free or no-added-sugar dark chocolate chips
- 1 teaspoon natural peanut butter
- 1 teaspoon unsweetened almond milk
Optional Peanut Butter Swirl
- 2 tablespoons creamy peanut butter
- 1 teaspoon powdered zero-calorie sweetener
- ½ teaspoon unsweetened almond milk
Optional Toppings
- 1 tablespoon finely chopped roasted peanuts
- Light sprinkle of cocoa powder
- Tiny pinch of flaky sea salt
- 1 tablespoon finely chopped dark chocolate
- A few mini sugar-free chocolate chips
Ingredients
For the Chocolate Peanut Butter Fudge Base
- 1½ cups creamy natural peanut butter
- 1 cup plain Greek yogurt
- 2 scoops chocolate protein powder
- 4 tablespoons unsweetened cocoa powder
- 4 tablespoons powdered zero-calorie sweetener, or to taste
- 2 teaspoons vanilla extract
- ½ teaspoon salt
- 4 tablespoons unsweetened almond milk, plus more only if needed
For the Chocolate Fudge Layer
- ½ cup sugar-free or no-added-sugar dark chocolate chips
- 2 teaspoons natural peanut butter
- 2 teaspoons unsweetened almond milk
Optional Peanut Butter Swirl
- 4 tablespoons creamy peanut butter
- 2 teaspoons powdered zero-calorie sweetener
- 1 teaspoon unsweetened almond milk
Optional Toppings
- 2 tablespoons finely chopped roasted peanuts
- Light sprinkle of cocoa powder
- Tiny pinch of flaky sea salt
- 2 tablespoons finely chopped dark chocolate
- A few mini sugar-free chocolate chips
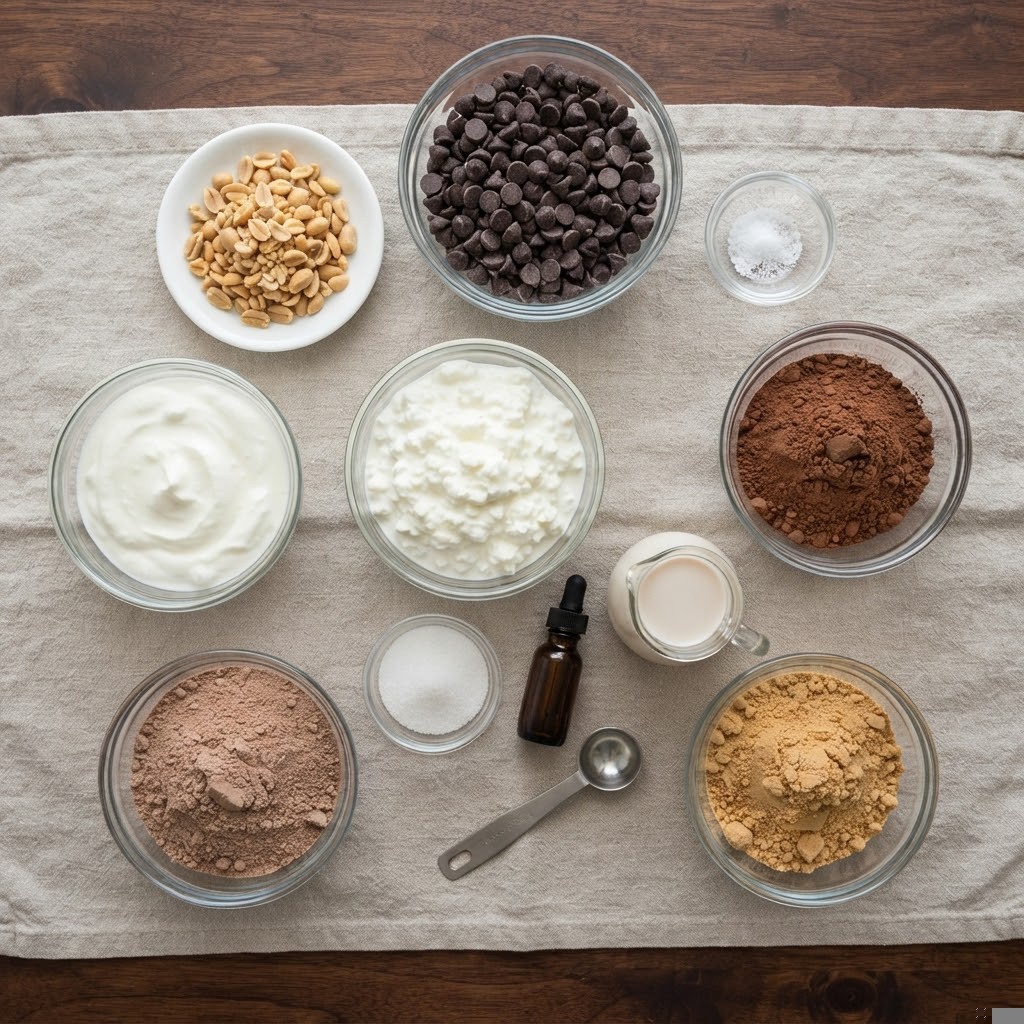
How to Make Chocolate Peanut Butter Protein Fudge Cups
Step 1: Prepare the Cups
Line an 8-cup mini muffin pan with paper or silicone liners.
You can also use small silicone dessert molds or small individual containers.
Silicone molds are especially convenient because the chilled fudge releases easily.
Set the prepared cups aside.
Step 2: Make the Chocolate Peanut Butter Mixture
Add the peanut butter to a medium mixing bowl.
Add:
- Greek yogurt
- Chocolate protein powder
- Cocoa powder
- Powdered sweetener
- Vanilla extract
- Salt
Stir slowly with a spatula.
At first, the mixture may look thick and slightly dry.
That’s normal.
Step 3: Add the Almond Milk
Add 2 tablespoons almond milk.
Mix thoroughly.
The mixture should become thick, smooth, and spreadable.
You are looking for a consistency similar to very thick brownie batter.
If it is still too stiff to work with, add another teaspoon of almond milk at a time.
Don’t add a large amount all at once.
The goal is a thick fudge texture, not a thin mousse.
Step 4: Taste and Adjust
Taste a tiny amount of the mixture.
This is your opportunity to adjust the flavor.
If you want it sweeter, add another small amount of powdered sweetener.
If you want stronger chocolate flavor, add another teaspoon of cocoa powder.
If the chocolate tastes slightly bitter, a tiny additional amount of sweetener and vanilla can balance it.
If you want stronger peanut butter flavor, add another teaspoon of peanut butter.
Remember that chilling can slightly mute sweetness, so the mixture should taste just a touch sweeter than your final preference before chilling.
Step 5: Prepare the Chocolate Layer
Place the chocolate chips in a microwave-safe bowl.
Add:
- 1 teaspoon peanut butter
- 1 teaspoon almond milk
Microwave in 10–15 second intervals, stirring well between each interval.
Continue until the chocolate is almost completely melted.
Stir until completely smooth.
Do not overheat the chocolate.
Short heating intervals give you much more control.
Step 6: Build the First Layer
Spoon a small amount of the chocolate mixture into the bottom of each prepared cup.
You don’t need a thick layer.
Approximately 1 teaspoon per cup is enough for the first layer.
Use the back of a small spoon to spread it evenly.ight, savory tomato pan sauce.
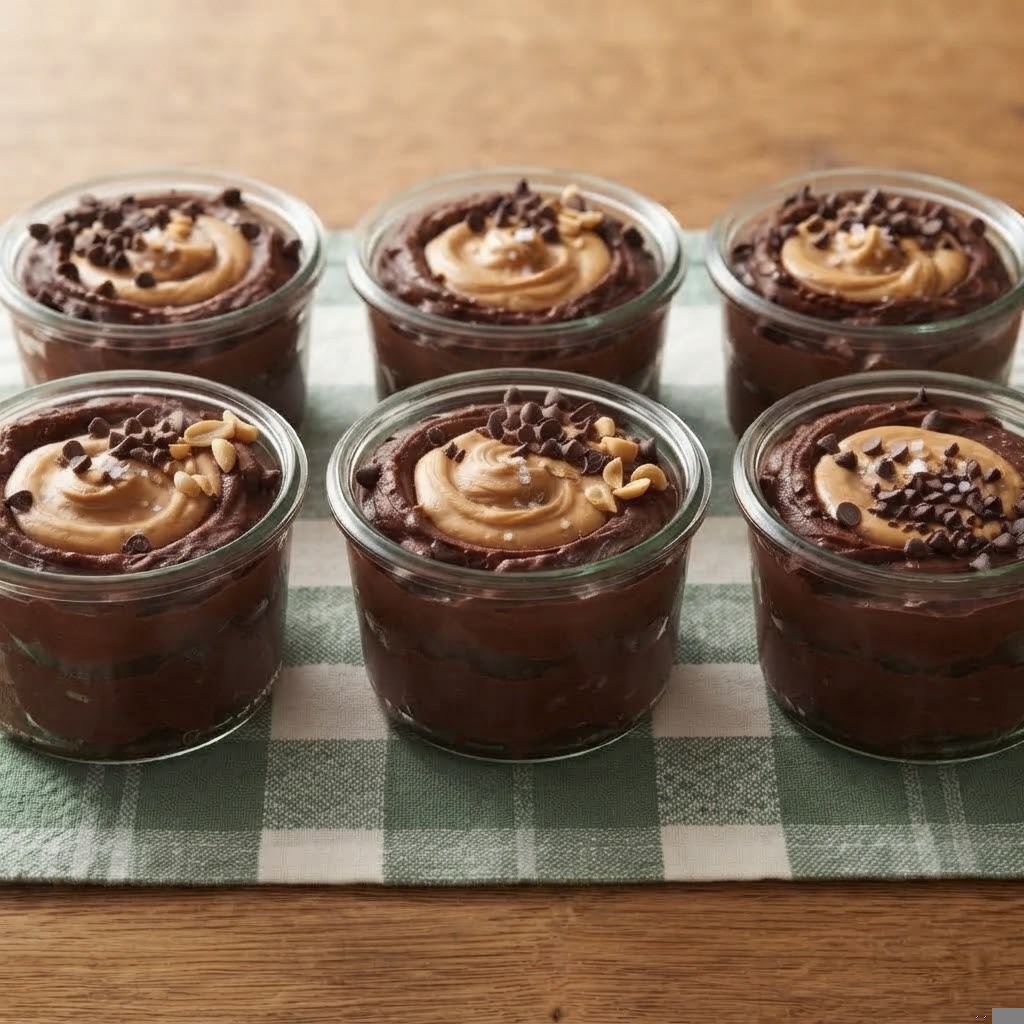
Step 7: Add the Protein Fudge Filling
Divide the chocolate peanut butter mixture evenly among the cups.
Use approximately 1½–2 tablespoons per cup, depending on the size of your molds.
Gently press the mixture down with the back of a spoon.
Try to keep the tops relatively flat.
Step 8: Add the Chocolate Finish
Spoon a small amount of the melted chocolate mixture over the top of each fudge cup.
Spread gently so the chocolate covers the surface.
You don’t need a thick chocolate shell.
A thin layer gives you that satisfying chocolate finish without making the cups overly hard after chilling.
Step 9: Create the Peanut Butter Swirl
If using the optional peanut butter swirl, combine:
- Peanut butter
- Powdered sweetener
- Almond milk
Mix until smooth.
Place a small dot on top of each cup.
Use a toothpick or the tip of a small spoon to gently swirl the peanut butter through the chocolate.
Don’t over-swirl.
A few visible peanut butter ribbons look better and give you little pockets of peanut butter flavor.
Step 10: Add the Finishing Touches
Top each cup with one or two of the following:
- Finely chopped roasted peanuts
- Tiny pinch of flaky sea salt
- Light dusting of cocoa powder
- A few tiny chocolate pieces
Keep the toppings light.
The fudge itself already has plenty of flavor.
Step 11: Chill
Place the cups in the refrigerator.
Chill for at least 1 hour.
For the firmest fudge-like texture, chill for 1½–2 hours.
The filling becomes thicker and more set as it chills.
If you prefer a softer, creamier texture, remove them from the refrigerator about 5 minutes before serving..
The SmartDietKitchen Flavor Hack
Add a tiny pinch of salt.
Chocolate and peanut butter both benefit from a little salt.
Don’t add enough to make the dessert taste salty.
You simply want enough to sharpen the chocolate and make the peanut butter taste richer.
If you’re using salted peanut butter, reduce the additional salt.
Share Recipe
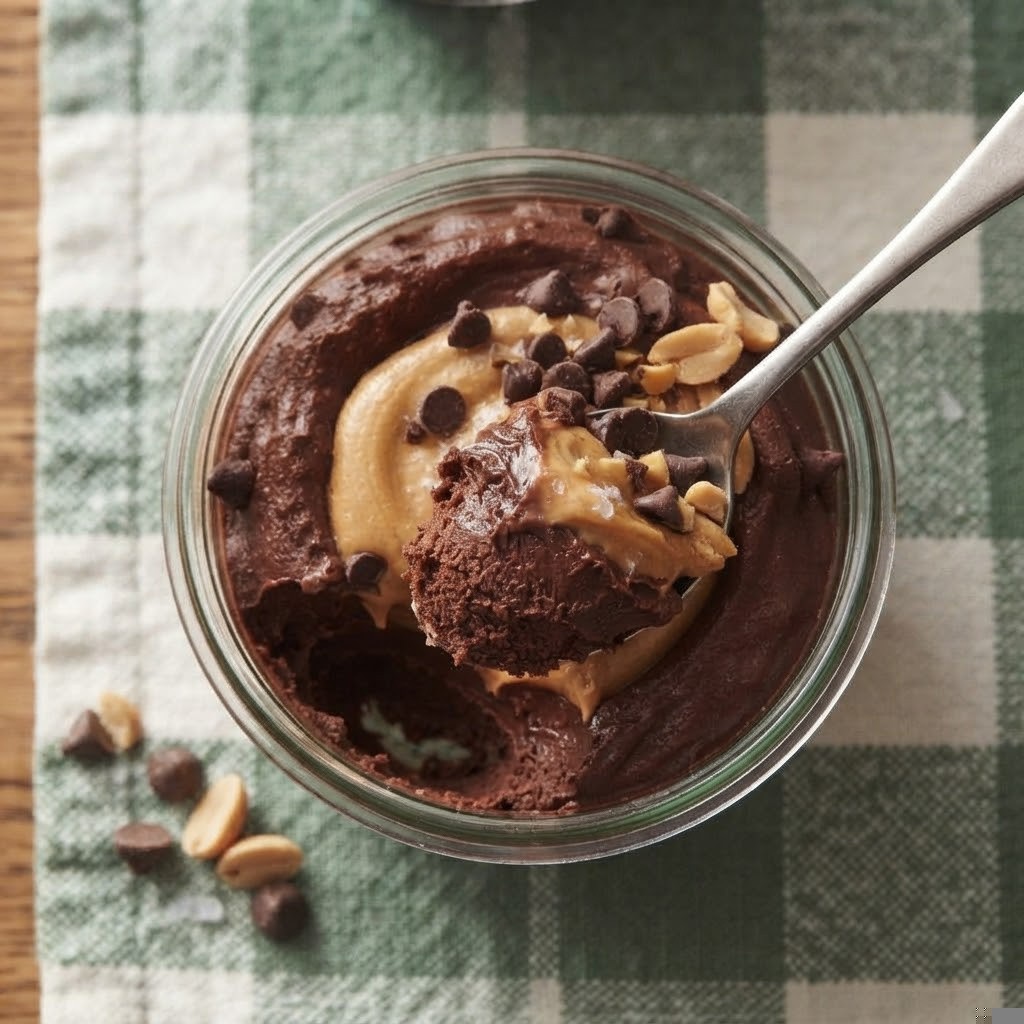
Chocolate Peanut Butter Protein Fudge Cups
Recipe by

Servings
8 small cups

prep Time
15 min

Chill Time
1–2 hours

Cuisine:
American-inspired
The secret is a simple combination of creamy peanut butter, chocolate protein powder, cocoa, Greek yogurt, and a little melted dark chocolate. Once everything is combined and chilled, the mixture transforms into a thick, fudgy filling that feels much more indulgent than the ingredient list suggests.
Instead of making a huge batch of traditional fudge loaded with sugar, these are made as individual little cups, making them easy to portion and perfect for keeping in the refrigerator whenever a chocolate craving hits.
Ingredients
For the Chocolate Peanut Butter Fudge Base
- ¾ cup creamy natural peanut butter
- ½ cup plain Greek yogurt
- 1 scoop chocolate protein powder
- 2 tablespoons unsweetened cocoa powder
- 2 tablespoons powdered zero-calorie sweetener, or to taste
- 1 teaspoon vanilla extract
- ¼ teaspoon salt
- 2 tablespoons unsweetened almond milk, plus more only if needed
For the Chocolate Fudge Layer
- ¼ cup sugar-free or no-added-sugar dark chocolate chips
- 1 teaspoon natural peanut butter
- 1 teaspoon unsweetened almond milk
Optional Peanut Butter Swirl
- 2 tablespoons creamy peanut butter
- 1 teaspoon powdered zero-calorie sweetener
- ½ teaspoon unsweetened almond milk
Optional Toppings
- 1 tablespoon finely chopped roasted peanuts
- Light sprinkle of cocoa powder
- Tiny pinch of flaky sea salt
- 1 tablespoon finely chopped dark chocolate
- A few mini sugar-free chocolate chips
Instructions
Step 1: Prepare the Cups
Line an 8-cup mini muffin pan with paper or silicone liners. You can also use small silicone dessert molds or individual containers. Set aside.
Step 2: Make the Chocolate Peanut Butter Mixture
Add the peanut butter to a medium mixing bowl. Add the Greek yogurt, chocolate protein powder, cocoa powder, powdered sweetener, vanilla extract, and salt.
Stir slowly with a spatula until combined. The mixture may initially look thick and slightly dry, which is normal.
Step 3: Add the Almond Milk
Add 2 tablespoons almond milk and mix thoroughly.
The mixture should become thick, smooth, and spreadable, similar to very thick brownie batter. If it is still too stiff, add another teaspoon of almond milk at a time until workable.
Do not add too much liquid. The goal is a thick fudge texture, not a thin mousse.
Step 4: Taste and Adjust
Taste a small amount of the mixture and adjust the flavor if needed.
For extra sweetness, add a little more powdered sweetener. For a stronger chocolate flavor, add another teaspoon of cocoa powder. If the chocolate tastes slightly bitter, a little extra sweetener and vanilla can help balance it.
For a stronger peanut butter flavor, add another teaspoon of peanut butter.
Keep in mind that chilling can slightly reduce the perception of sweetness, so the mixture should taste slightly sweeter than your preferred final flavor.
Step 5: Prepare the Chocolate Layer
Add the chocolate chips to a microwave-safe bowl. Add 1 teaspoon peanut butter and 1 teaspoon almond milk.
Microwave in 10–15 second intervals, stirring well after each interval, until almost completely melted. Stir until smooth.
Avoid overheating the chocolate.
Step 6: Build the First Layer
Spoon approximately 1 teaspoon of the melted chocolate mixture into the bottom of each prepared cup.
Spread gently with the back of a small spoon to create an even, thin layer.
Step 7: Add the Protein Fudge Filling
Divide the chocolate peanut butter mixture evenly among the cups, using approximately 1½–2 tablespoons per cup, depending on the size of your molds.
Gently press the mixture down and smooth the tops with the back of a spoon.
Step 8: Add the Chocolate Finish
Spoon a small amount of the remaining melted chocolate over each cup.
Spread gently to cover the surface. Keep the chocolate layer thin so it remains easy to bite through after chilling.
Step 9: Create the Peanut Butter Swirl
If using the optional peanut butter swirl, combine the peanut butter, powdered sweetener, and almond milk until smooth.
Place a small dot of the mixture on top of each cup. Use a toothpick or the tip of a small spoon to gently swirl it through the chocolate.
Avoid over-swizzling so the peanut butter remains visible in small ribbons.
Step 10: Add the Finishing Touches
Top each cup with a light amount of your choice:
- Finely chopped roasted peanuts
- A tiny pinch of flaky sea salt
- A light dusting of cocoa powder
- A few small chocolate pieces
Keep the toppings light since the fudge is already rich and flavorful.
Step 11: Chill
Place the fudge cups in the refrigerator and chill for at least 1 hour.
For the firmest, fudge-like texture, chill for 1½–2 hours.
The filling will become thicker and more set as it chills. For a softer, creamier texture, let the cups sit at room temperature for about 5 minutes before serving.
Notes
Nutrition will vary depending on the exact protein powder, peanut butter, chocolate chips, Greek yogurt, sweetener, and toppings used.
Share this recipe
The Secret to Better Chocolate Flavor
Don’t rely entirely on chocolate protein powder.
Protein powders vary dramatically in flavor.
The combination of:
cocoa powder + chocolate protein powder + a little melted dark chocolate
creates a much more convincing chocolate dessert.
The cocoa gives depth.
The protein powder provides the protein.
The melted chocolate gives richness and a smoother finish.
Tips for Perfect Protein Fudge Cups
Use creamy peanut butter
Natural peanut butter works well, but make sure it is thoroughly stirred before measuring.
The oil naturally separates in some peanut butters.
Don’t add too much liquid
This is one of the biggest mistakes you can make.
Too much almond milk will turn the mixture into a soft pudding rather than fudge.
Use powdered sweetener
Powdered sweetener blends more smoothly than granulated sweetener.
Chill completely
The fudge needs time to firm up.
Don’t judge the final texture immediately after mixing.
Don’t overheat the chocolate
Chocolate can seize or become thick if overheated.
Short intervals are better.
Delicious Variations
Salted Chocolate Peanut Butter Fudge Cups
Add a tiny pinch of flaky sea salt over the chocolate topping.
The sweet-salty combination makes the chocolate and peanut butter taste even richer.
Peanut Butter Crunch Fudge Cups
Add 1 tablespoon finely chopped roasted peanuts to the fudge mixture.
The result has little crunchy peanut pieces throughout the creamy center.
Chocolate Coconut Fudge Cups
Add 1 tablespoon unsweetened shredded coconut to the filling.
Top with a tiny amount of coconut.
Chocolate, peanut butter, and coconut make a surprisingly delicious combination.
Espresso Chocolate Fudge Cups
Add ¼ teaspoon instant espresso powder to the chocolate mixture.
You won’t necessarily taste coffee.
Instead, it intensifies the chocolate flavor.
Dark Chocolate Raspberry Fudge Cups
Add a few finely chopped raspberries to the center.
The tart fruit balances the rich chocolate and peanut butter.
For the best texture, use only a small amount of fruit so the filling doesn’t become watery.
Cinnamon Peanut Butter Fudge Cups
Add ⅛ teaspoon cinnamon to the filling.
The cinnamon adds a warm background note without overpowering the chocolate.
Chocolate Almond Butter Cups
Replace the peanut butter with creamy almond butter.
The flavor becomes slightly more delicate and nutty.
Bariatric-Friendly Serving Tips
Because bariatric dietary needs vary depending on surgery type, recovery stage, and individual tolerance, use the portion and food-texture guidance provided by your own bariatric care team.
For a bariatric-friendly serving:
- Start with one small cup.
- Eat slowly.
- Take small bites.
- Chew thoroughly.
- Pay attention to fullness.
- Keep toppings minimal if higher-fat ingredients are difficult to tolerate.
- Use smooth peanut butter rather than chunky peanut butter if texture is an issue.
- Avoid large pieces of nuts if your current eating stage does not tolerate them well.
- Choose a protein powder you already know you tolerate.
These cups are intentionally made as small portions, rather than one large slab of fudge.
For people who are in an early post-bariatric diet stage, this dessert may not be appropriate yet. Follow the specific food and texture progression given by your surgical or dietetic team.
Meal Prep Instructions
These are excellent for meal prep.
Make the entire batch on one day.
Allow the cups to fully set.
Transfer them to an airtight container once firm.
Keep them refrigerated so you have a ready-to-eat protein-focused treat whenever you want something sweet.
You can also place parchment paper between layers if stacking them.
Storage
Store the fudge cups in an airtight container in the refrigerator.
They are best enjoyed within approximately 4–5 days for the best texture and flavor.
Keep them chilled because the yogurt-based filling becomes softer at room temperature.
If you’re serving them at a gathering, take out only the number you plan to eat rather than leaving the entire batch out.
Can You Freeze Them?
Yes.
Place the fully chilled cups in a freezer-safe airtight container.
Freeze for up to approximately 1 month for best quality.
Allow them to thaw in the refrigerator before eating.
The texture may become slightly firmer after freezing and thawing, but they can still be delicious.
For the softest texture, let them sit in the refrigerator overnight after thawing.
What to Serve With Them
These fudge cups are designed to be a standalone dessert.
However, they pair beautifully with:
- Fresh strawberries
- Fresh raspberries
- A few blueberries
- Unsweetened coffee
- Black tea
- A small glass of unsweetened almond milk
- Plain Greek yogurt
For a simple dessert plate, serve one fudge cup with a few fresh berries.
Frequently Asked Questions
Can I use crunchy peanut butter?
Yes, but creamy peanut butter gives the smoothest texture.
If you’re following a bariatric eating pattern and currently have difficulty with crunchy textures, creamy peanut butter is the better choice.
Can I use powdered peanut butter?
Yes.
You can replace part of the regular peanut butter with powdered peanut butter.
However, regular peanut butter contributes more creaminess and fat, so replacing all of it may make the fudge drier.
If using powdered peanut butter, add a little extra Greek yogurt or almond milk as needed.
Can I use vanilla protein powder?
Yes, but the chocolate flavor will be less intense.
If using vanilla protein powder, increase the cocoa powder slightly.
Can I make these without Greek yogurt?
Yes.
The Greek yogurt helps make the filling creamy and contributes protein.
You can experiment with blended cottage cheese or another thick plain yogurt, although the texture and flavor will change.
Why are my fudge cups too soft?
The most common reasons are:
- Too much almond milk
- Too much Greek yogurt
- Not enough chilling time
- Very runny peanut butter
- A protein powder that absorbs less liquid
Refrigerate them longer first.
If they are still too soft, you can mix in a little additional cocoa powder or protein powder before chilling again.
Why did my chocolate topping become hard?
That’s normal to some degree.
Chocolate firms as it chills.
Keeping the topping thin prevents it from becoming excessively hard.
You can also allow the cups to sit at room temperature for a few minutes before eating.
Can I make these sweeter?
Yes.
Add powdered zero-calorie sweetener gradually.
Different protein powders have different sweetness levels, so always taste the mixture before assembling.
Can I make these dairy-free?
Yes, but you’ll need to replace the Greek yogurt with a thick dairy-free yogurt and choose a suitable dairy-free protein powder and chocolate.
The texture may be slightly different.
Can I use honey instead of zero-calorie sweetener?
You can, but it will increase the sugar and carbohydrate content and may make the mixture softer.
If you use honey, add it gradually and reduce the other liquid slightly if needed.
Can I make these as one large fudge block?
Yes.
Press the mixture into a small parchment-lined container.
Chill until firm, then cut into small squares.
However, individual cups make portion control easier and are more convenient for meal prep.
Can I make them more chocolatey?
Absolutely.
Add another teaspoon of cocoa powder or a small amount of melted dark chocolate.
You can also add a tiny pinch of espresso powder to intensify the chocolate flavor.
Can I make these without the chocolate topping?
Definitely.
The chocolate peanut butter filling tastes delicious by itself.
Simply portion the mixture into cups, add the peanut butter swirl, and chill.
Final Thoughts
These Chocolate Peanut Butter Protein Fudge Cups are exactly the kind of dessert that makes high-protein eating feel a lot less restrictive.
They’re creamy in the center, rich with chocolate, packed with peanut butter flavor, and finished with just enough chocolate on top to give you that classic fudge experience.
But unlike traditional fudge, these are made as small individual portions with Greek yogurt and protein powder contributing to the protein content.
The best part is how easy they are.
No oven.
No complicated baking.
No waiting for a cake to cool.
Just mix, layer, chill, and enjoy.
Keep a batch in the refrigerator, and you’ll have a ready-to-grab chocolate treat whenever the craving hits.
If chocolate and peanut butter are your weakness, these little cups might become one of the most dangerous recipes in your refrigerator — because it’s very easy to tell yourself you’re only having one.


Leave a Reply